Shivaji Solutions Mail offers a true business-class email. We provide a simple and easy-to-use interface available across various platforms with some cool features like better backup, higher delivery guarantees, premium features like Integrated video calling, email tracking, and many more.
If you wish to use Shivaji Solutions Mail on a Third Party application like Gmail, you can do so by following the simple steps mentioned below:
To protect your account, accessing 3rd party clients will be blocked when the two-factor authentication is enabled. You can refer to this article for instructions on disabling two-factor authentication on Shivaji Solutions
1. Log into your Gmail Account.
2. Click on the Cog drop-down menu (in the upper-right) and select Settings.
3. Click the Accounts tab.
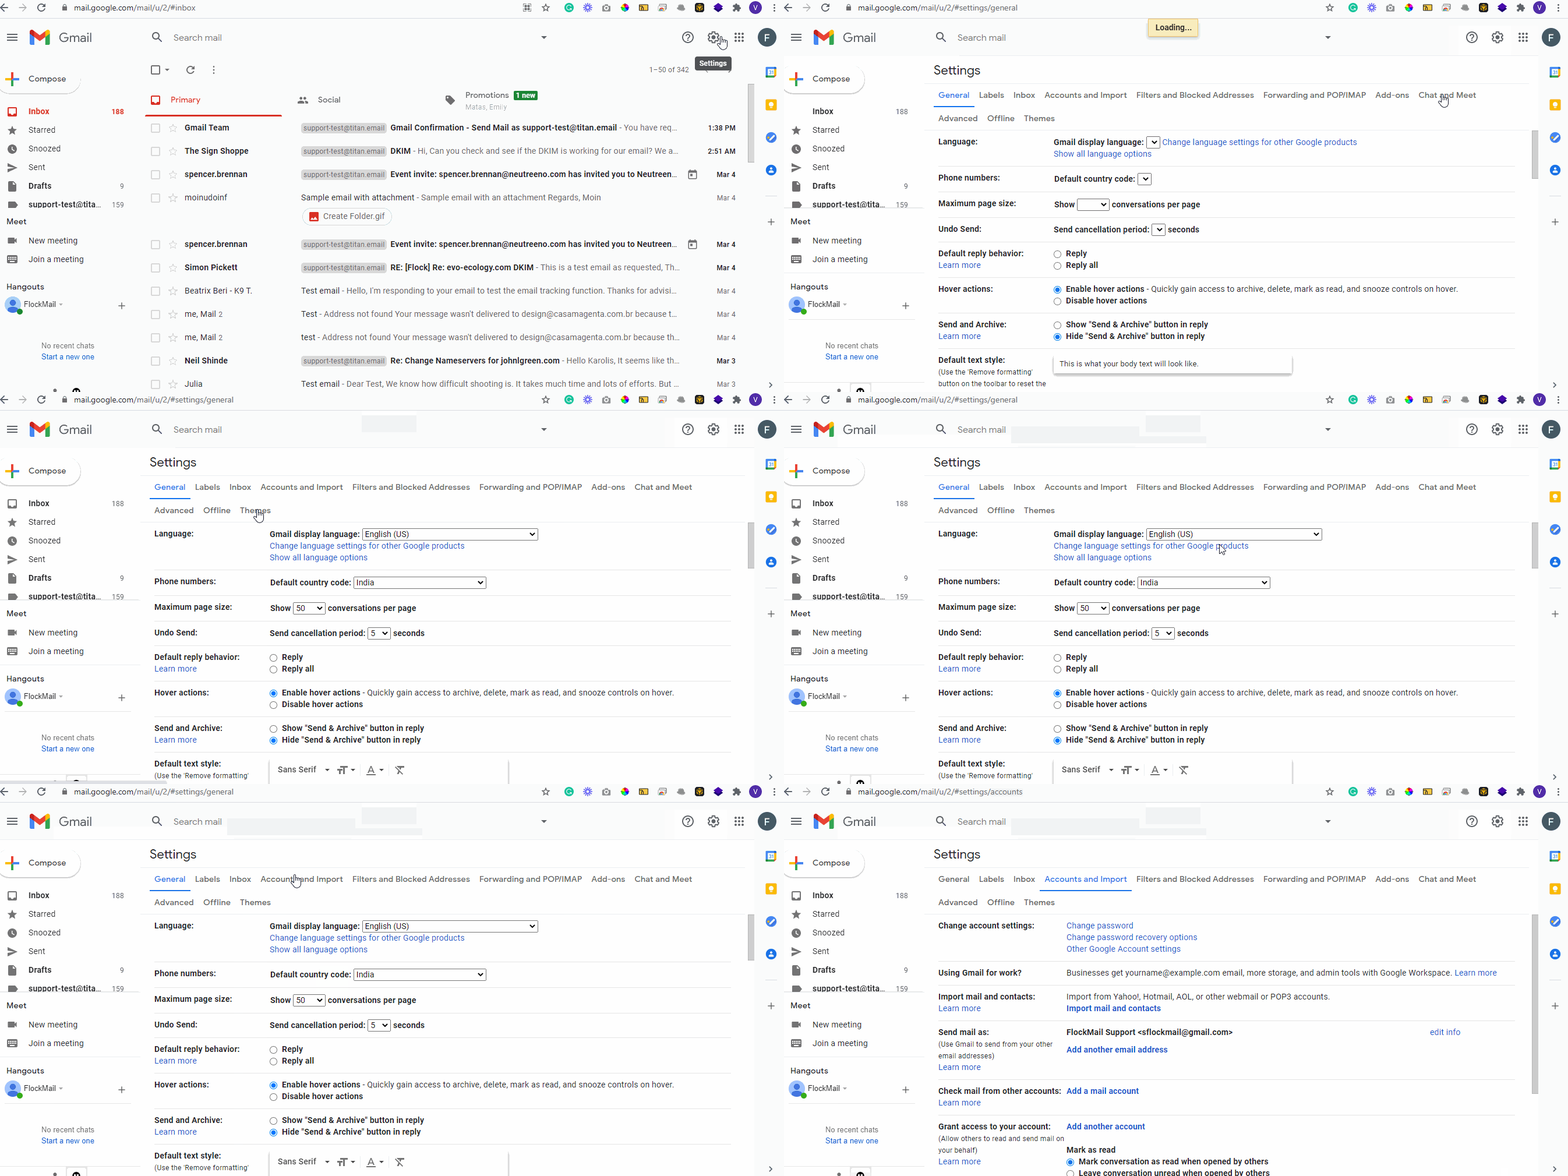
4. Next to Check mail from other accounts, click Add a mail account.
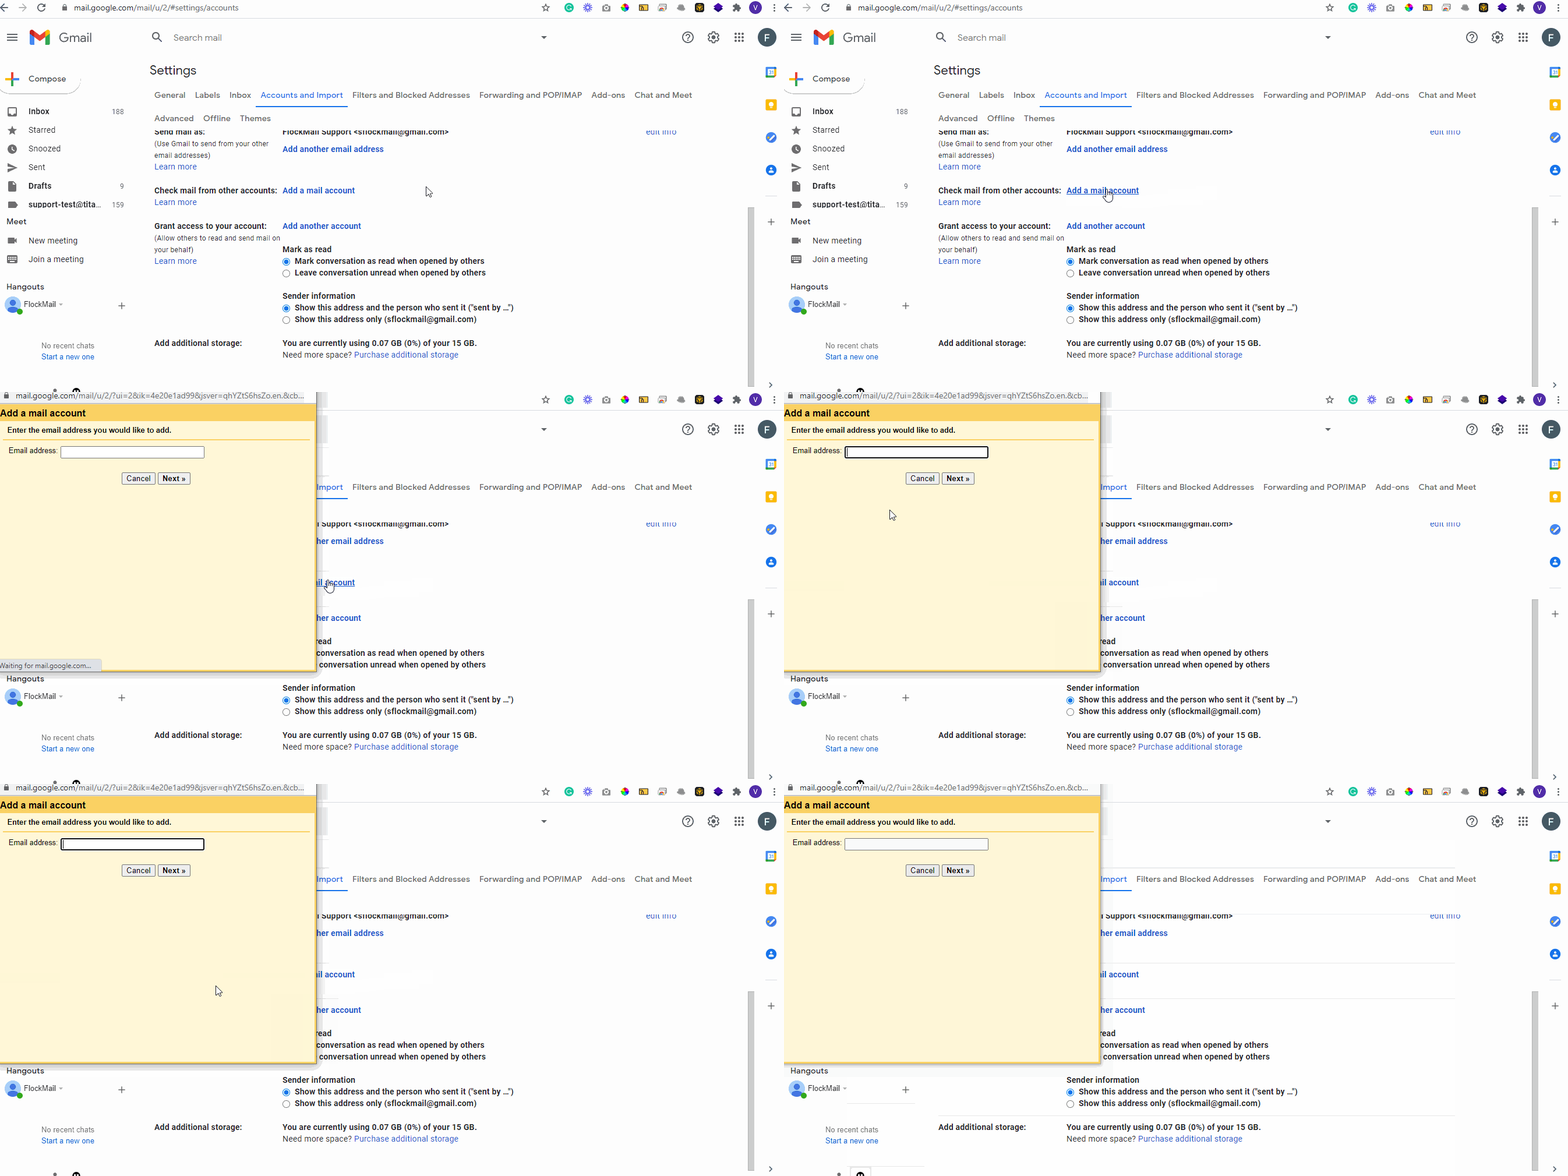
A pop-up window will appear to continue the setup process. You will need to allow pop-ups in your browser settings if you do not see the pop-up window appear.
5. Enter the email address you created for your domain and click Next.
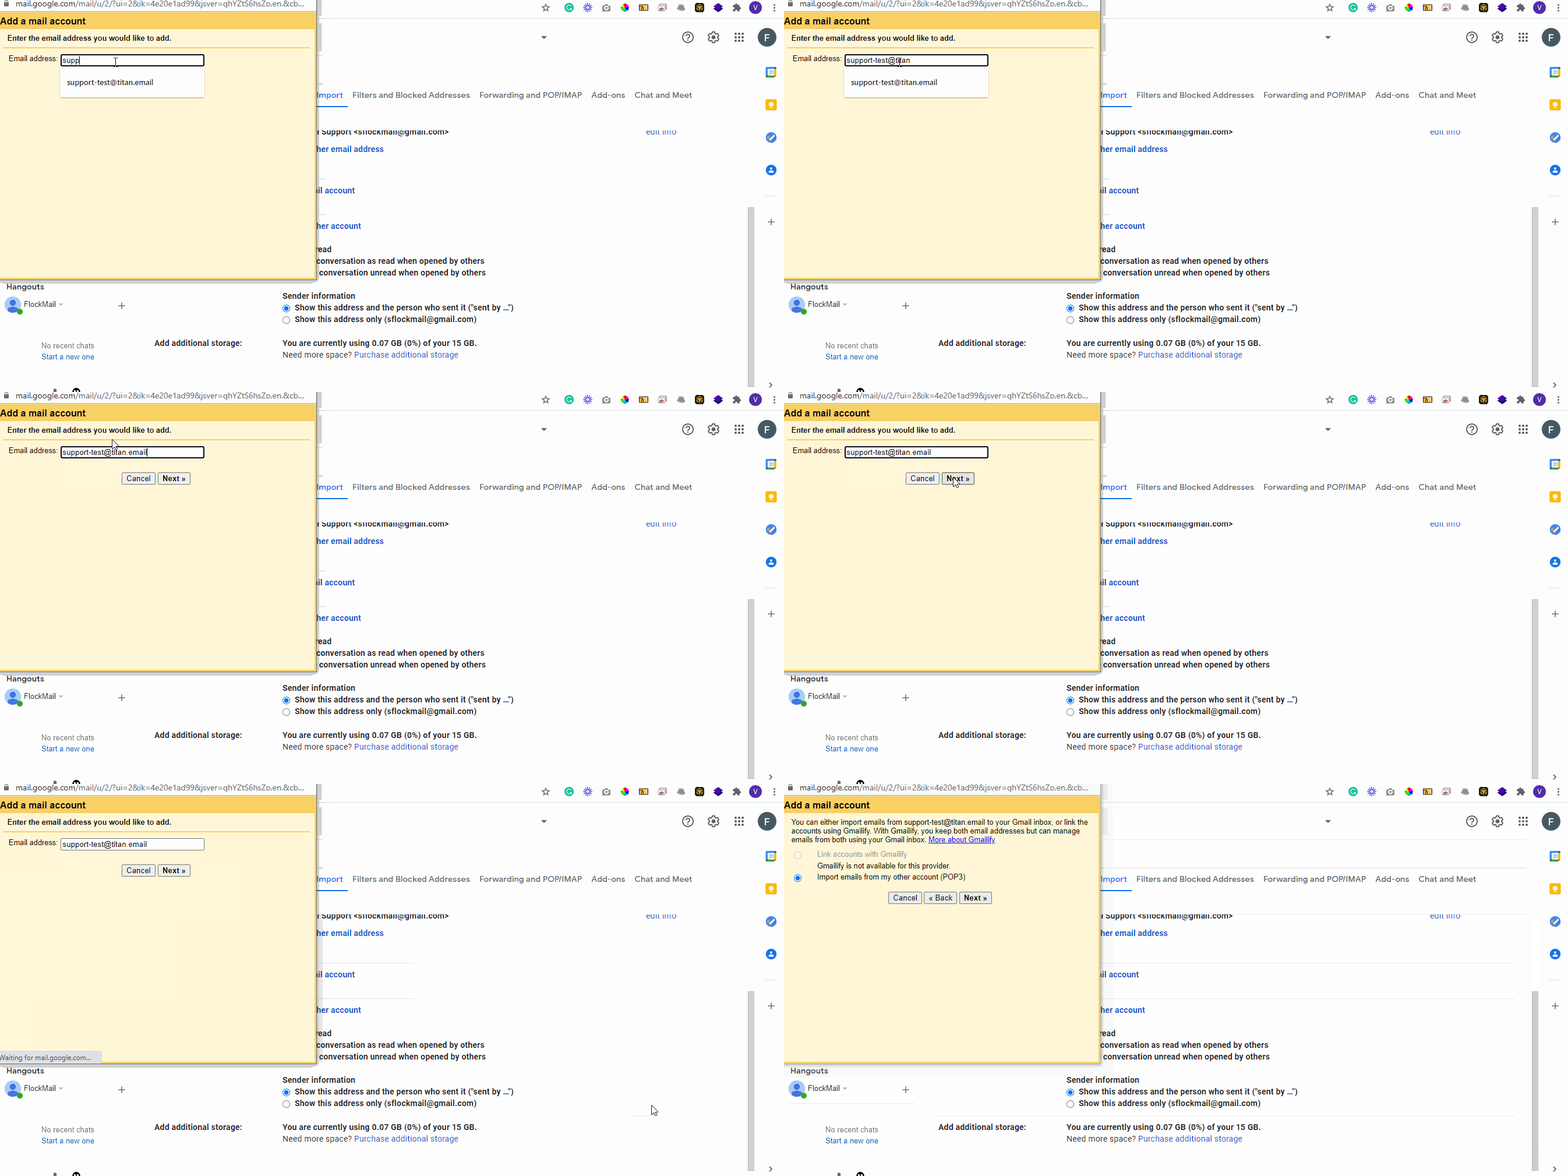
6. Enter the POP3 settings for your domain’s Shivaji Solutions Mail email address. Then click Add Account.
To ensure that all incoming emails are visible via Shivaji Solutions interface and Gmail, please tick the first option “Keep copy of retrieved messages from server“. If you do not tick that option, all incoming emails will be visible only in Gmail interface and not in Shivaji Solutions interface.
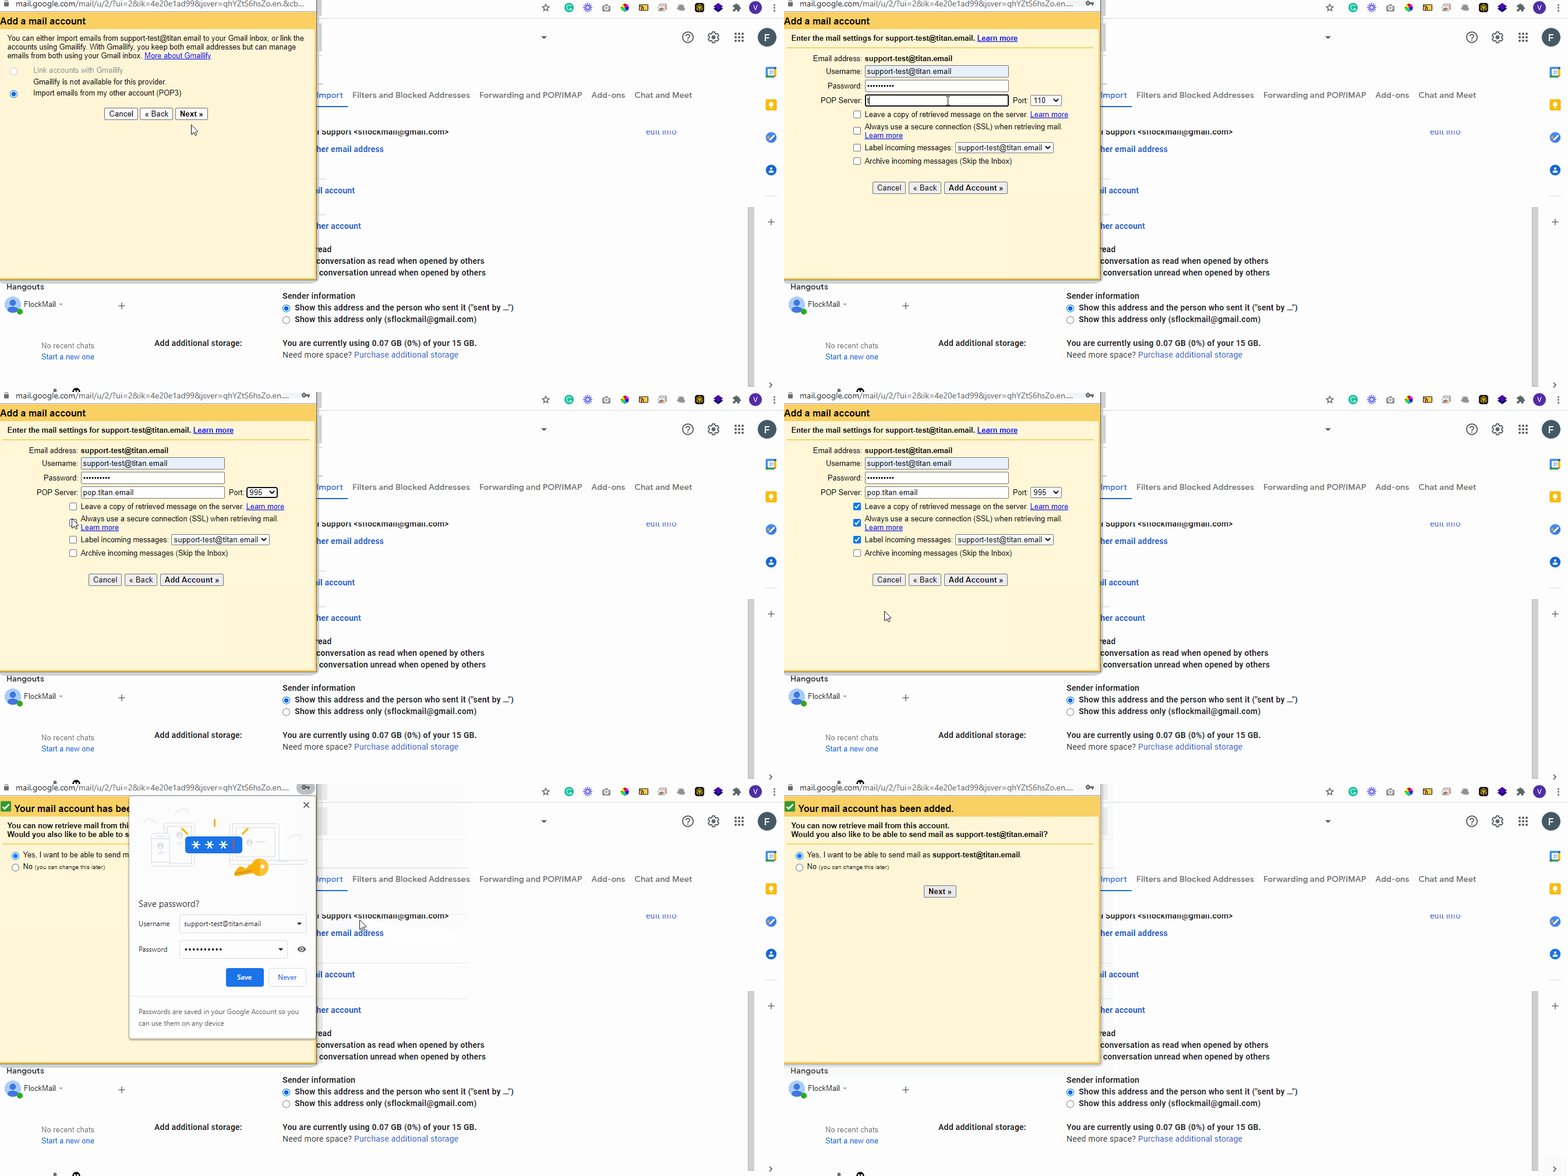
You will see a message stating ” Your mail account has been added “.
7. To continue to set up SMTP in Gmail, select Yes and click Next Step.

If you do not want to send emails for your domain through Gmail, click the No button. You don’t need to follow the next steps
8. Enter your Name, as you would like it to appear when sending emails from this account. Also, ensure that the checkbox for Treat as an alias is checked.
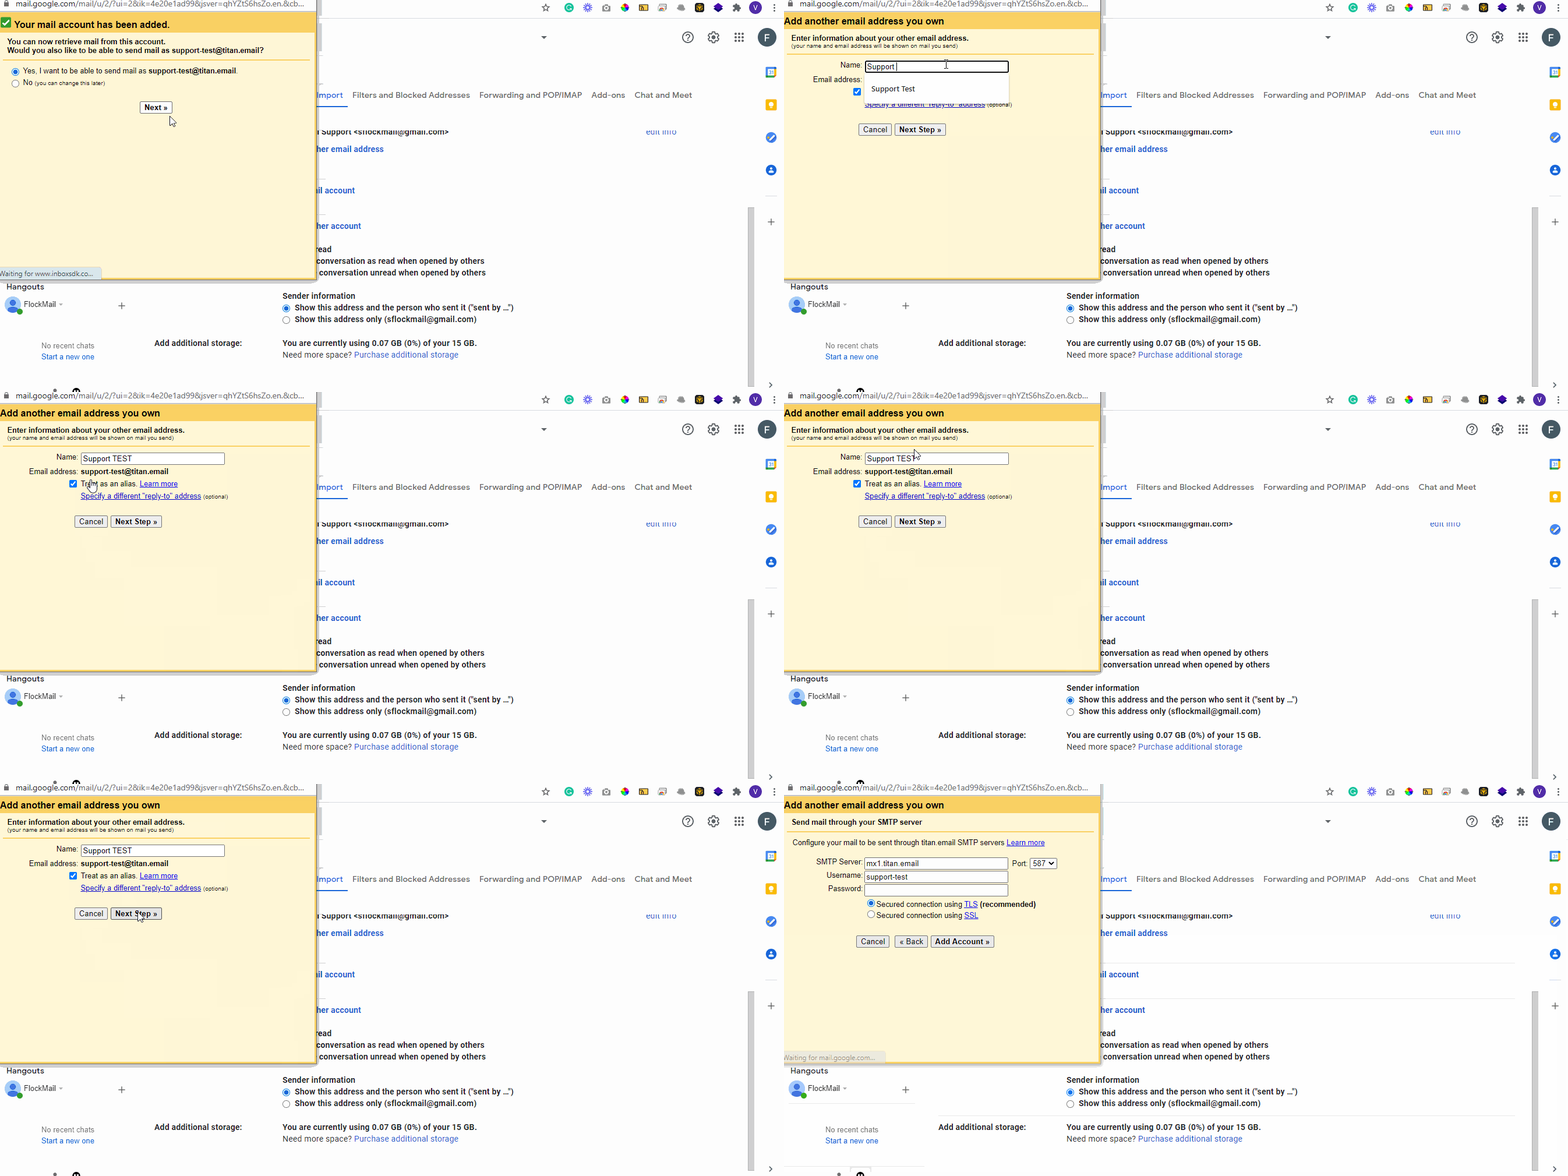
9. On the Send mail through your SMTP server page, fill in your SMTP Shivaji Solutions Mail Server Username (full email address), and Email Password.
Then, click the Add Account button.
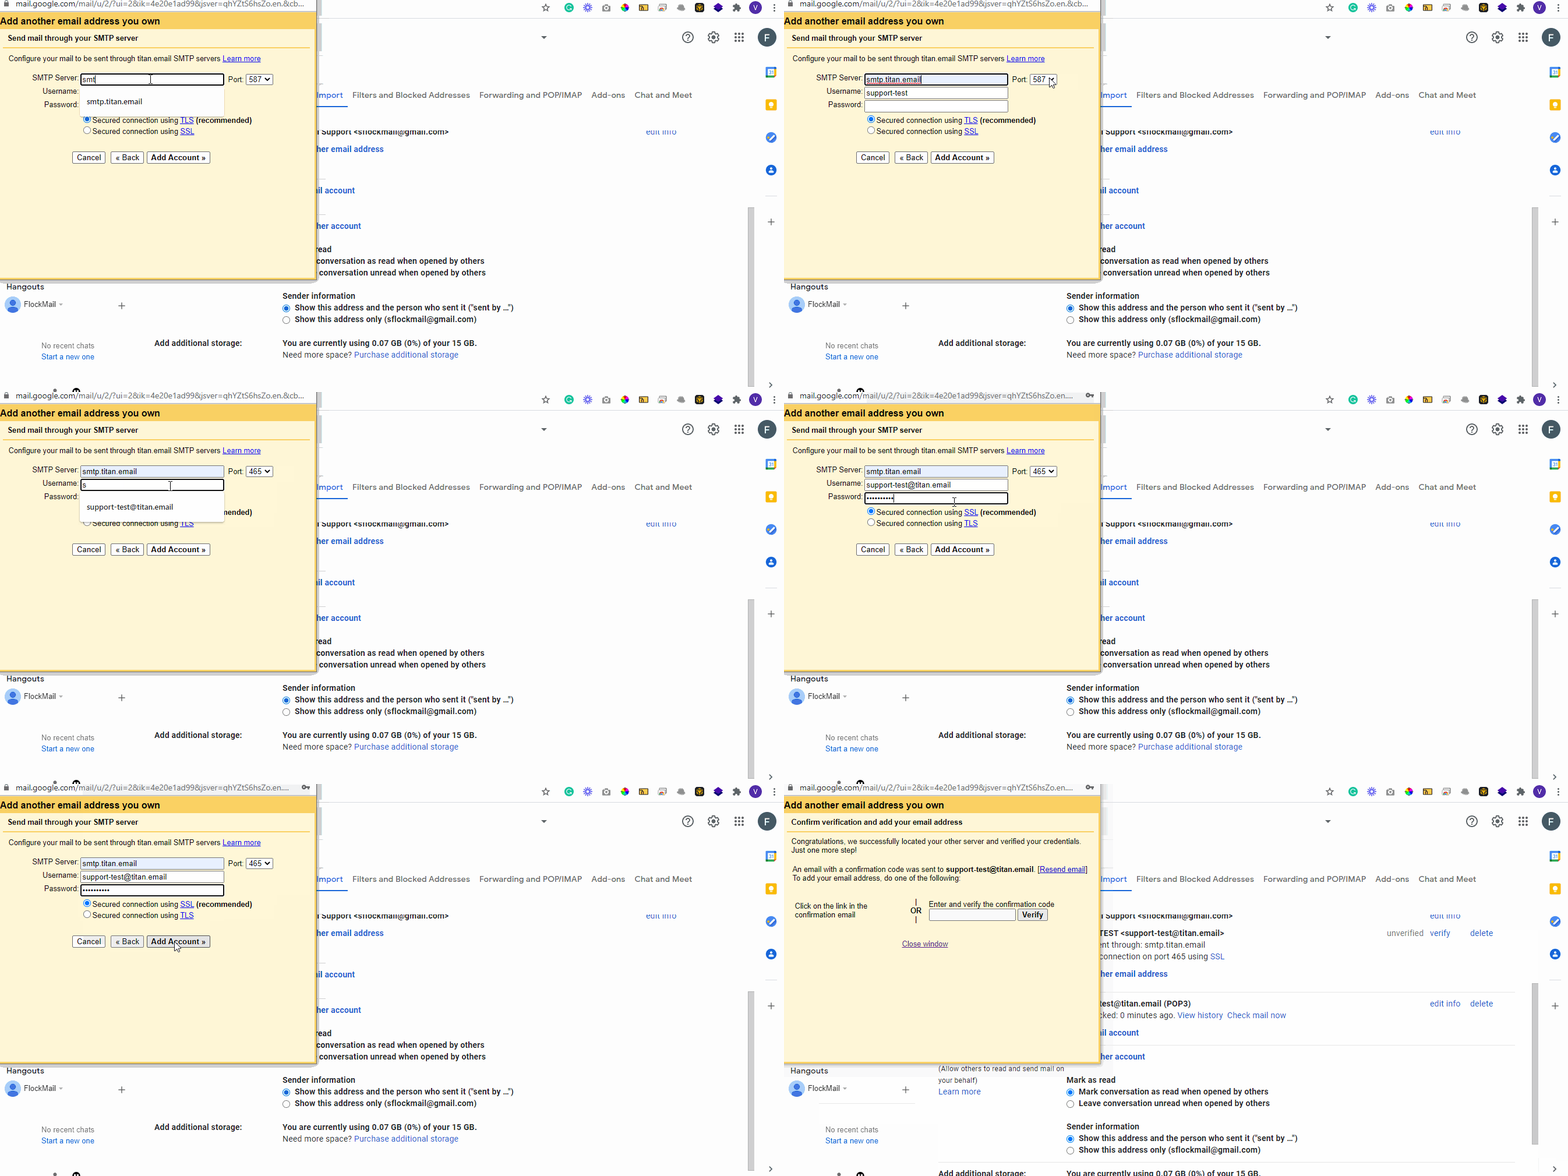
10. Now, Gmail will email a verification code to the email address you just added. You can either click the link in the email or copy/paste the code into the text box and click Verify.
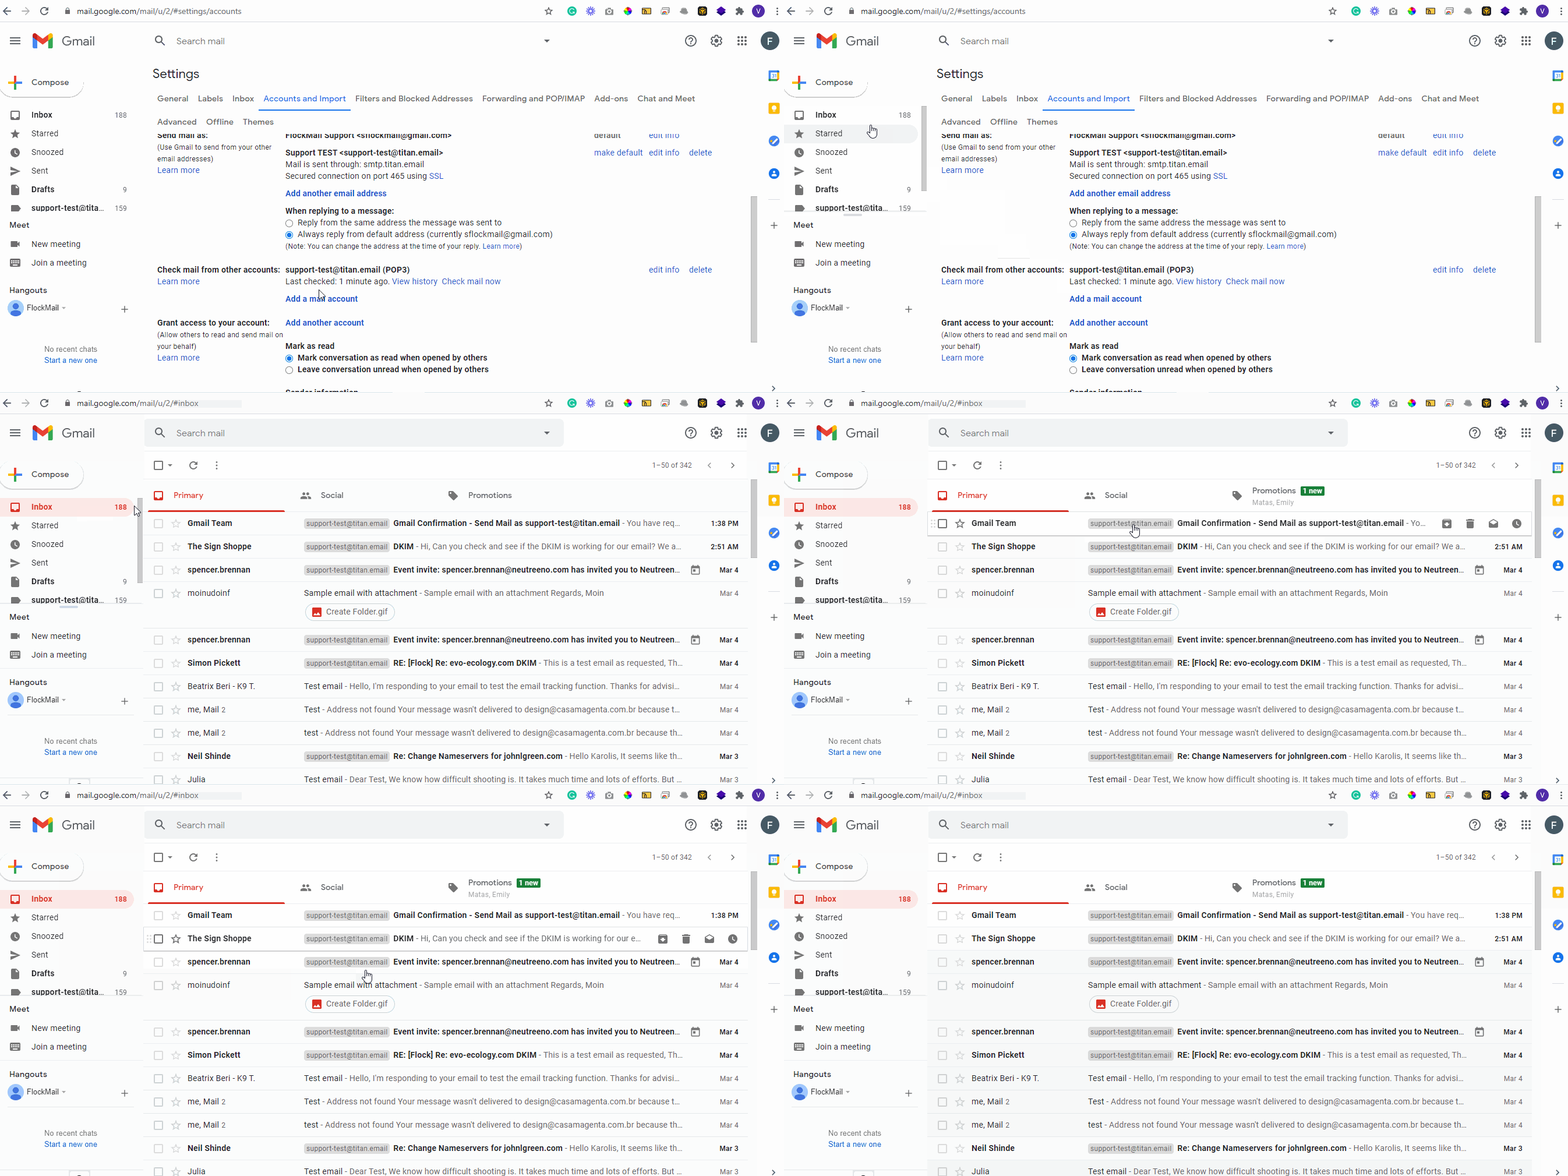
Congratulations! You have now configured your Shivaji Solutions Mail on your Gmail!
You can now check your mails on Gmail’s inbox interface.
Configuration Settings:
| Username is same as email address POP server: pop.titan.email Port: 995 | Username is same as email address SMTP server: smtp.titan.email Port: 465 |
If you get an error stating “Unable to connect to pop.titan.email” please follow the steps mentioned below to enable the POP setup in your Gmail account:
1. In the Settings page in Gmail, click on the “Forwarding and POP/IMAP” tab in the top bar.
2. Then select the option to Enable POP .
Feel free to knock on our door by writing to us at bharatkerai7@gmail.com in case you need any assistance with configuring these records.


